As Quicken provides you to reduce paperwork with a quick bill pay service, download transactions from the bank, print checks and etc. But sometimes Quicken users face some glitches while accessing this account. You may encounter Quicken Error OL-221-A, or Error OL-221-B while using an online service and unfortunately being a non-tech person unable to cope-up such an issue on their own. You need not be worried at that point as we are offering the link quicken.com/contact-support from where you can get the whole information. Hence, only one click will troubleshoot your error code OL-221-A from your Quicken account.

Steps to Fix Quicken Error OL-221-A
There are basically five possible ways to fix this issue. Here we have mentioned all those methods. Therefore, you only have to walk through all those points carefully and perform the given tasks on your own. After that, you will notice that your Quicken account is working hassle-freely or without any obstacle. Hence, take a glimpse at once:
Step 1: Make Sure That the Latest Version of Quicken is Running
- Open a Quicken account first
- Go to Help > Check for Updates
- Click Yes if an update is available
- Hit OK if it’s already updated
Step 2: Click On the Account in Which You Receive This Error
- Open Quicken
- Go to Tools > One Step Update Summary
- Check the account with this error is presented
- Write the account name with this specific error
- Go to such account and then click on the gear icon on the right-hand side
- Click the “Update Now” button
Step 3: Deactivate/Reactivate the Account
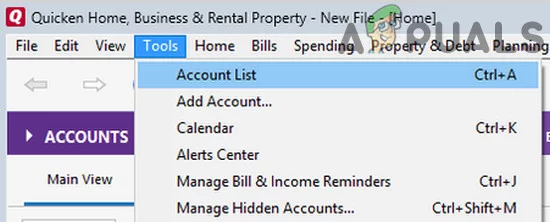
- Go to Tools > Account List

- Click on Edit with such accounts which is presented with this error code
- Click “Online Services” and then tap “Deactivated”
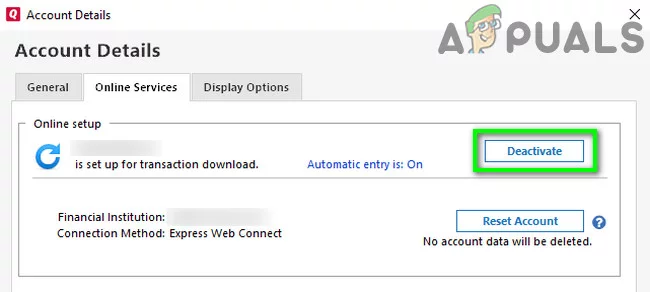

- Hit “Yes” to Confirm
- Press “OK” and then Done
- Give a check on Validate file and then press OK
- Once validation is completed a DATA_LOG notepad display the status of the file
- Go to Tools > Account List
- Click on Edit
- Click on the Online Services tab
- Hit “Set up Now…”
- Type the username and password for your financial institution
- Click Connect
- During reactivation of the account, Quicken will pull up your account information
- Make sure to LINK your account
Step 4: Uninstall/Reinstall Quicken
- Press the “Windows + R” key from the keyboard at the same time and select Run
- Type appwiz.cpl in the search box
- Program and Features window will open and then look for Quicken
- Make a single Click on Quicken
- Click the Uninstall button
- Now follow the on-screen instruction
- Once you have successfully uninstalled Quicken, reinstall it back to the computer via CD or directly from Quicken Website
- Now try to update the accounts in Quicken
Step 5: Wait 24-48 Business Days
Moreover, you can leave work with the Quicken account for around 24-48 days and then after try to work again.
Have you gone through all those above-mentioned steps very carefully? Are still getting the same error code? Feeling blue because of that? If seriously it is, then don’t be disheartened! Just contact experts via Quicken Support Chat instantly and receive a reliable and effective solution in an easier manner.