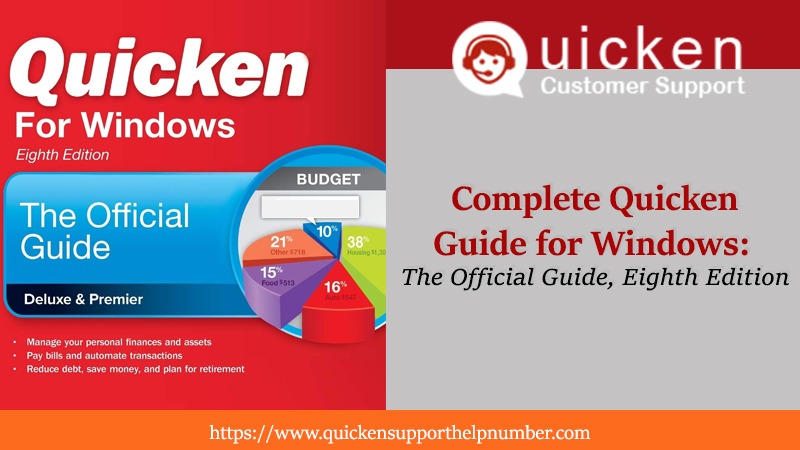
Complete Quicken Guide for Windows: The Official Guide, Eighth Edition

Quicken for Windows users have increased multiple folds and the year 2021 will see lots of new users subscribing to this ultimate personal finance management software. Hence is the need for an accurate and complete Quicken user guide to get the people on board without hiccups.
This article will serve as a DIY guide for new users and a reference point for those who have been using Quicken for quite a long time. So, you fall in whichever category, this article will guide you to a couple of new features that you can use in Quicken to leverage this excellent money management machine. Here we go.
What you’ll find in this Quicken user guide?
Here we will make you explore, how to:
- Purchase, download, and install Quicken subscription.
- Activate the Quicken membership.
- Setup the Quicken profile.
- Add the first bank account.
- Set up the Quicken preferences.
- Keep transactions up-to-date by updating the Quicken accounts.
- Categorize transactions to track the expenses.
- Avoid late payment fees by setting up bills and income reminders.
- Create and manage your budget.
- Access Quicken from your phone or tab.
Quicken user guide for Windows – Complete steps
Let’s have a look at the complete steps to optimize Quicken to the max and make the most of it.
-
Purchase, download, and install Quicken subscription
Either you can purchase Quicken directly from the www.Quicken.com website or from third-party retailers like Amazon, Best Buy, Staples, etc. There is nothing different in both versions, but when you buy it from retailers, you’ll be getting a 16-digit activation code that you will need to enter while activating your product (go to step 2 to activate Quicken).
- You have an option to choose from different Quicken for Windows editions like Quicken Starter, Deluxe, Premier, or Home and Business.
- Some of the Quicken for Windows editions also come up with 30 days money-back guarantee.
- Once you choose the Quicken edition as per your choice, you need to click on the Buy now option.
- After that, you will be prompted to either Sign In with an existing Quicken account or create a new Quicken ID.
- Now keep following the on-screen instructions to complete the Quicken purchase.
- Once done, you will see the My Account window on your screen with complete details like Quicken information, plan details, and download Quicken section.
- Click Download for Windows in the Download Quicken section to get the personal finance manager on your device.
-
Activate your Quicken membership
Like we shared in the previous section, the steps to activate Quicken product varies, depending on whether you bought Quicken from the Quicken.com website or from any third-party retailer. Here we have covered both ways.
Activation steps for Quicken product purchased from Quicken.com
- Remember you have created a Quicken ID in the previous step? That ID is associated with your Quicken subscription membership that you need to use to activate Quicken.
- Enter your email or Quicken ID and Password in the sign-in window to activate your Quicken for Windows membership.
Activation steps for Quicken product purchased from a retailer
- Simply, navigate to www.Quicken.com/download from on your computer.
- Install Quicken on your computer.
- Login to the software using your QuickenID (create the one if you don’t have it).
- Keep following the on-screen instructions and enter your 16 digit activation code.
- Now enjoy working with Quicken, set up your profile, add your first account, and set the bills and income reminders.
-
Setup the Quicken profile
Once you are done with a product purchase, download, and activation, the next step is to set up your personalized Quicken profile. Here you can.
- Update your Quickenprofile by filling in your personal details.
- Choose whether or not to sync Quicken data with a mobile device or Quicken web application.
- Click Use mobile option to sync checking, city savings, credit card, and investments for your mobile access. Give a friendly name or description to identify this file on your mobile.
- If you’re not sure to sync Quicken data for mobile access then choose the option Don’t use mobile.
-
Add your first bank account
- Launch Quicken on your computer.
- Go to tools.
- Click add an account.
- Enter the name of your financial institution or you can choose your bank name from the list on your screen, click next.
- You might be prompted to enter the bank sign-in information.
- It will be the same as your online banking login ID and password.
- Choose the option to save this password if you want Quicken to remember it for the next time.
- Click connect.
- You can also add a short name for your account, click next and click finish.
Great you have successfully added your first bank account on Quicken. Now you download the transactions to run reports on your income, expenses, taxes, and investment.
-
Set up the Quicken preferences
Quicken offers you multiple color schemes or themes to give a superb user experience. You can set up the start-up location, dim the disabled Windows, or link your Quicken data with the cloud, etc. Now you can manage your Quicken as you have never done before.
-
Keep transactions up-to-date by updating the Quicken accounts
Once you are done with Quicken accounts set up, you can keep your transactions up-to-date. Here you must note that if you have chosen the option Save this password during Quicken account set up, then you will be required to enter the passcode for only your Password vault. Or else, you will need to re-enter the password that you have chosen during the Quicken account setup. To update the transactions, go to tools and then click one-step update.
Also Read: How to Move Quicken to New Computer?
-
Categorize transactions to track the expenses
Categorizing the transactions helps you to know where you have been spending your money or which category consumes more money than others. Quicken automatically categorizes the transactions once it gets downloaded from the bank. For instance, if you have spent credit card at Staples, then Quicken will categorize that transaction into Food and Dining: Groceries.

However, in a few cases, Quicken may not accurately recognize the category and in that case, you can manually set up the category for the first time. Here is how you can add or set up a category of your choice. Go to Tools, click Category list and then select Add a category. You can also choose a New Category option on the top right inside to set up an unrecognized category of your choice.
-
Avoid late payment fees by setting up the bills and income reminders
Besides tracking your income or expenses, Quicken also helps you avoid late payment fees by setting up the bill and income reminders. Follow the below steps.
- Go to the bills and income on Quicken.
- Click the get started button.
- A new screen will open, click online bill.
- Now you may choose the biller or enter the name of your biller that you want to link with Quicken.
- After that, you can also choose to get the biller displayed in your register so as to see the impact of biller spendings on your account balance.
-
Create and manage your budget
If you hadn’t missed any point until now in this Quicken user guide, then you would have got to know about the expenses, incomes and got an excellent hold of your finances. The next step comes to align your spending with your incomes. Now that’s where the budgeting comes into action. This step will help you limit down the over budgeting problems with your finances. Follow the steps given below to create a personalized budget.
- Go to the Home tab on your Quicken.
- Click Get started in the Budget your spending section.
- Enter the Budget name under the Create a new budget section and click Ok.
- Once done, the home screen will show you the savings left and expenses made until now.
-
Access Quicken from Your Phone or Web Application
Users can also access Quicken from a mobile app available for Android & iOS. Now you can carry your finance management tool in your pocket. You can also turn on the notifications for your account balances or bill reminders.
Here is How You can Set up Quicken on Your Mobile Phone.
- Visit the Play Store or App Store on your mobile.
- Search for a Quicken and click the install now option.
- Now login to your Quicken application using QuickenID and password.
- Once done, your information will be available on your mobile phone.
Follow These Steps to Set Up Quicken on the Web Application.
- Visit the website app.Quicken.com/login.
- Enter your Quicken ID and password in the field box and click enter.
- After that, you can download the bank information and investment accounts.
- Additionally, you can also sync Quicken desktop with the Web to update the investment accounts.
Had a Query Regarding Quicken? We Will be Glad to Help
Here we end this write up, hopefully, this Quicken user guide was highly useful in setting up Quicken for the first time or another. This guide will tell you the quick steps whether it’s about purchasing a Quicken subscription, downloading Quicken desktop, or setting up your first account. If still, you are facing trouble with Quicken setup, you can straight away drop us a call @ Quicken support number and ask for immediate help. We will be glad to assist you in all ways.


46 Comments
aksara178 · January 18, 2024 at 11:57 am
… [Trackback]
[…] Find More to that Topic: quickensupporthelpnumber.com/blog/complete-quicken-guide-for-windows/ […]
เว็ปเวดดิ้ง · February 2, 2024 at 6:57 pm
… [Trackback]
[…] Read More Info here to that Topic: quickensupporthelpnumber.com/blog/complete-quicken-guide-for-windows/ […]
bloten tieten · February 12, 2024 at 1:33 pm
… [Trackback]
[…] Read More on that Topic: quickensupporthelpnumber.com/blog/complete-quicken-guide-for-windows/ […]
CAISHEN WINS สล็อตอาแปะ · February 24, 2024 at 5:24 pm
… [Trackback]
[…] Here you will find 31506 additional Information to that Topic: quickensupporthelpnumber.com/blog/complete-quicken-guide-for-windows/ […]
jorjno · March 12, 2024 at 2:44 pm
… [Trackback]
[…] Read More here to that Topic: quickensupporthelpnumber.com/blog/complete-quicken-guide-for-windows/ […]
baby bunnies · March 29, 2024 at 10:32 pm
… [Trackback]
[…] Information to that Topic: quickensupporthelpnumber.com/blog/complete-quicken-guide-for-windows/ […]
best eft exploits · April 25, 2024 at 4:35 pm
… [Trackback]
[…] Read More Information here on that Topic: quickensupporthelpnumber.com/blog/complete-quicken-guide-for-windows/ […]
suicide bombing · June 19, 2024 at 4:41 am
… [Trackback]
[…] Find More on that Topic: quickensupporthelpnumber.com/blog/complete-quicken-guide-for-windows/ […]
พูลวิลล่าพัทยา · July 6, 2024 at 7:47 pm
… [Trackback]
[…] Info on that Topic: quickensupporthelpnumber.com/blog/complete-quicken-guide-for-windows/ […]
เว็บปั้มติดตาม · July 6, 2024 at 8:38 pm
… [Trackback]
[…] Read More to that Topic: quickensupporthelpnumber.com/blog/complete-quicken-guide-for-windows/ […]
จำหน่ายอะไหล่อุตสาหกรรม · July 8, 2024 at 6:39 pm
… [Trackback]
[…] Find More on that Topic: quickensupporthelpnumber.com/blog/complete-quicken-guide-for-windows/ […]
Whore Parody Movie Transsex Sex Movie cuck-old sex voucher My site: anal pussy vouchers transgender Feet Fetish Latina Anal sex Shaved Pussy Medium Tits Small Tits voucher Brunette Mature MILF discount code Anal Sex porn Lesbian vouchers Threesome Promote · August 18, 2024 at 10:00 pm
… [Trackback]
[…] Read More Information here to that Topic: quickensupporthelpnumber.com/blog/complete-quicken-guide-for-windows/ […]
ufazeed · August 23, 2024 at 8:07 pm
… [Trackback]
[…] Read More on on that Topic: quickensupporthelpnumber.com/blog/complete-quicken-guide-for-windows/ […]
John Lobb · September 9, 2024 at 6:14 pm
… [Trackback]
[…] Info to that Topic: quickensupporthelpnumber.com/blog/complete-quicken-guide-for-windows/ […]
Otter Creek Polonium For Sale · September 20, 2024 at 7:04 pm
… [Trackback]
[…] Find More on that Topic: quickensupporthelpnumber.com/blog/complete-quicken-guide-for-windows/ […]
unky republic · September 24, 2024 at 3:28 pm
… [Trackback]
[…] Here you can find 65340 more Info to that Topic: quickensupporthelpnumber.com/blog/complete-quicken-guide-for-windows/ […]
read · September 27, 2024 at 7:18 am
… [Trackback]
[…] Here you can find 53214 additional Info to that Topic: quickensupporthelpnumber.com/blog/complete-quicken-guide-for-windows/ […]
https://vhnbio.com · September 29, 2024 at 10:01 am
… [Trackback]
[…] Here you can find 50109 more Information to that Topic: quickensupporthelpnumber.com/blog/complete-quicken-guide-for-windows/ […]
รับทำ SEO · October 22, 2024 at 10:23 am
… [Trackback]
[…] Information on that Topic: quickensupporthelpnumber.com/blog/complete-quicken-guide-for-windows/ […]
track location by phone number · October 25, 2024 at 8:01 am
track phone location
The mobile number tracker feature is precise when tracking family members. Gives peace of mind!
Konya Seo Uzmanı · October 25, 2024 at 8:29 am
Konya SEO Ajansı
Etliekmek yemeden Konya SEO uzmanı olamazsınız.
Buy followers instagram · October 27, 2024 at 5:42 pm
buy followers instagram
Reasonable prices to buy followers Instagram packages. Gradual delivery looked natural.
web tasarım fiyatları · October 27, 2024 at 7:36 pm
internet Sitesi Kurma
Internet sitesi kurma paketleri kapsamli. Hosting ve domain de dahil.
ประวัติ wm casino · October 31, 2024 at 5:58 pm
… [Trackback]
[…] There you will find 31312 additional Info on that Topic: quickensupporthelpnumber.com/blog/complete-quicken-guide-for-windows/ […]
football skills · November 7, 2024 at 7:32 pm
football skills
football skills hello i am a football skiller
cristiano ronaldo skills · November 7, 2024 at 7:49 pm
cristiano ronaldo skills
cristiano ronaldo skills hello i am a football player
cat888 · November 12, 2024 at 11:07 pm
… [Trackback]
[…] Read More to that Topic: quickensupporthelpnumber.com/blog/complete-quicken-guide-for-windows/ […]
บุหรี่นอกเก็บเงินปลายทาง · November 17, 2024 at 3:41 pm
… [Trackback]
[…] Here you will find 83948 more Information on that Topic: quickensupporthelpnumber.com/blog/complete-quicken-guide-for-windows/ […]
โคมไฟ · November 19, 2024 at 3:54 am
… [Trackback]
[…] Read More on to that Topic: quickensupporthelpnumber.com/blog/complete-quicken-guide-for-windows/ […]
บาคาร่าเกาหลี · November 19, 2024 at 9:27 pm
… [Trackback]
[…] Read More here on that Topic: quickensupporthelpnumber.com/blog/complete-quicken-guide-for-windows/ […]
Darknet · November 28, 2024 at 1:15 am
… [Trackback]
[…] Read More to that Topic: quickensupporthelpnumber.com/blog/complete-quicken-guide-for-windows/ […]
live cams · December 16, 2024 at 1:50 pm
… [Trackback]
[…] Find More here on that Topic: quickensupporthelpnumber.com/blog/complete-quicken-guide-for-windows/ […]
ตู้เก็บเสียง · December 16, 2024 at 6:48 pm
… [Trackback]
[…] Read More to that Topic: quickensupporthelpnumber.com/blog/complete-quicken-guide-for-windows/ […]
สล็อตเว็บตรง ทุนน้อยโบนัสแตกโหด ถอนได้ไม่อั้น · January 19, 2025 at 1:09 am
… [Trackback]
[…] There you can find 73902 more Info on that Topic: quickensupporthelpnumber.com/blog/complete-quicken-guide-for-windows/ […]
Engineering Technicians · January 23, 2025 at 10:02 pm
… [Trackback]
[…] Info on that Topic: quickensupporthelpnumber.com/blog/complete-quicken-guide-for-windows/ […]
hit789 · January 25, 2025 at 8:48 am
… [Trackback]
[…] Here you can find 41720 additional Information on that Topic: quickensupporthelpnumber.com/blog/complete-quicken-guide-for-windows/ […]
slot99 · January 25, 2025 at 2:45 pm
… [Trackback]
[…] Here you will find 39450 additional Info on that Topic: quickensupporthelpnumber.com/blog/complete-quicken-guide-for-windows/ […]
รับเขียนแบบบ้าน · February 6, 2025 at 1:52 am
… [Trackback]
[…] Here you will find 8095 additional Info on that Topic: quickensupporthelpnumber.com/blog/complete-quicken-guide-for-windows/ […]
www.rescue1plumbingllc.com/ · February 19, 2025 at 4:59 am
… [Trackback]
[…] Information to that Topic: quickensupporthelpnumber.com/blog/complete-quicken-guide-for-windows/ […]
Lowara distributor water pump · March 1, 2025 at 10:58 am
… [Trackback]
[…] Read More on to that Topic: quickensupporthelpnumber.com/blog/complete-quicken-guide-for-windows/ […]
토토 사이트 · March 14, 2025 at 3:55 pm
… [Trackback]
[…] Find More on to that Topic: quickensupporthelpnumber.com/blog/complete-quicken-guide-for-windows/ […]
ทางเข้าใหม่ HAY11 · March 15, 2025 at 5:46 am
… [Trackback]
[…] Info to that Topic: quickensupporthelpnumber.com/blog/complete-quicken-guide-for-windows/ […]
Werewolf\'s Hunt · March 27, 2025 at 7:36 pm
… [Trackback]
[…] There you can find 57722 more Info to that Topic: quickensupporthelpnumber.com/blog/complete-quicken-guide-for-windows/ […]
ufa777 · April 16, 2025 at 7:21 pm
… [Trackback]
[…] Find More Information here on that Topic: quickensupporthelpnumber.com/blog/complete-quicken-guide-for-windows/ […]
Yakuza Honor · May 1, 2025 at 5:22 pm
… [Trackback]
[…] There you will find 94600 more Info on that Topic: quickensupporthelpnumber.com/blog/complete-quicken-guide-for-windows/ […]
ตรวจสอบสลิปโอนเงิน · May 6, 2025 at 7:28 pm
… [Trackback]
[…] Find More to that Topic: quickensupporthelpnumber.com/blog/complete-quicken-guide-for-windows/ […]
Comments are closed.